
Creating C# Applications with Visual Studio
Creating the Console App
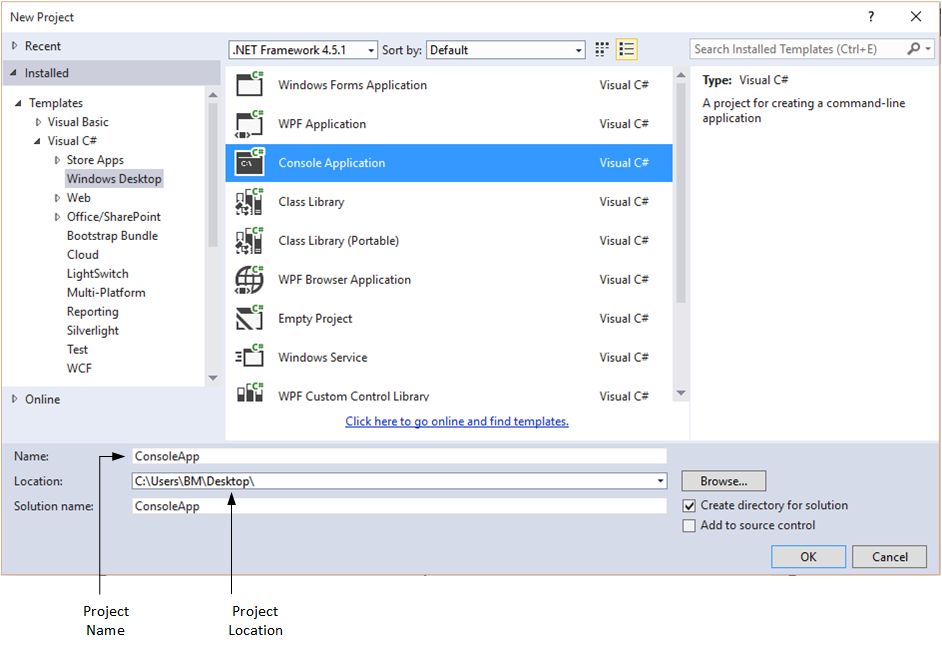
Open Visual Studio, select FILE New Project to display the New Project dialog. At the left side of the dialog, under Installed > Templates > Visual C# select the Windows category, then in the middle of the dialog select the Console Application template. In the dialog’s Name field, type ConsoleApp, then click OK to create the project.
Explanation of Visual Studio
Before continuing with the tutorials you need to know the most important elements of visual studio. The figure below represents all windows useful to create, edit and correct the visual C# code.
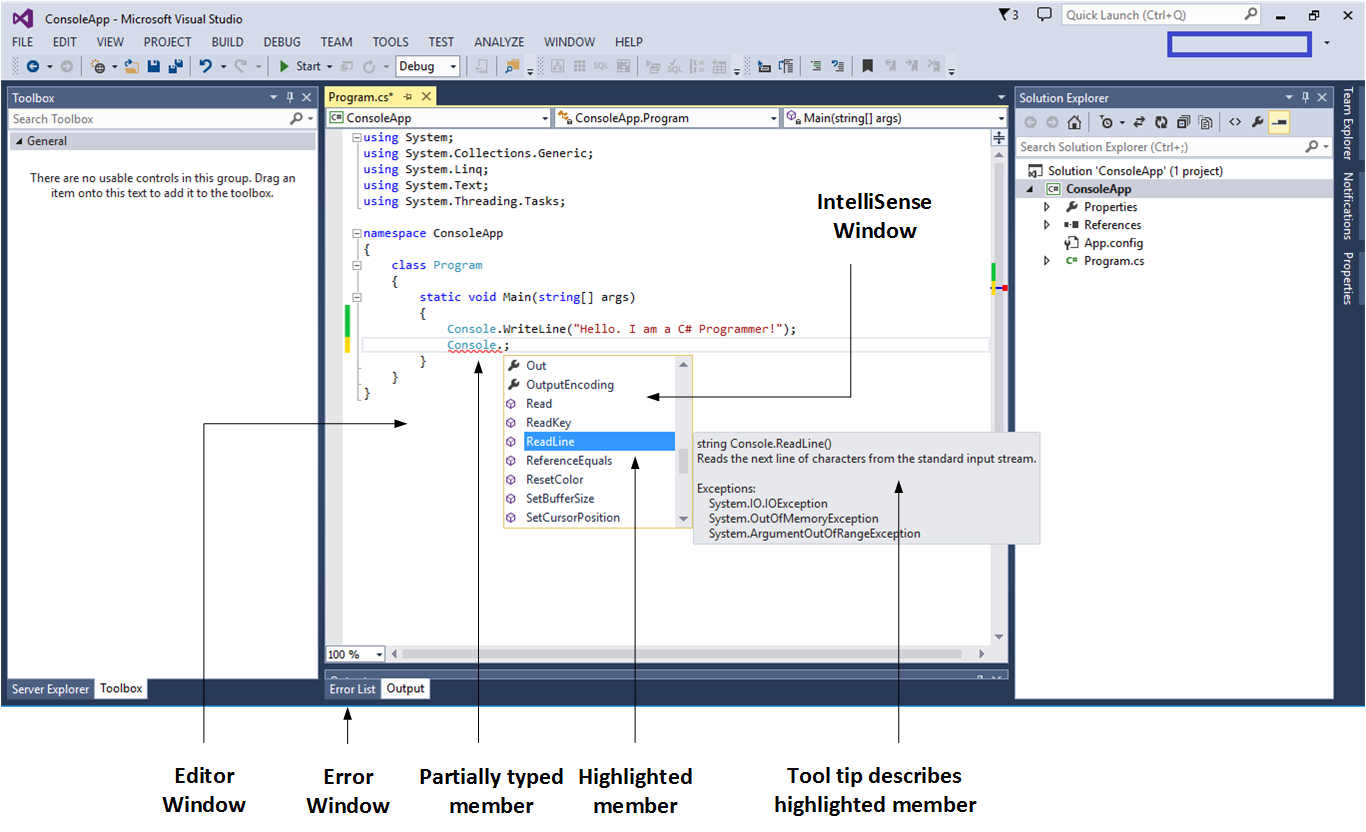
a. Writing Code and Using IntelliSense
IntelliSense is the general term for a number of features: List Members, Parameter Info, Quick Info, and Complete Word. These features help you to learn more about the code you are using, keep track of the parameters you are typing, and add calls to properties and methods with only a few keystrokes. Many aspects of IntelliSense are language-specific.
b. Error List Window
You can develop apps faster by using the Error List window. For example, you can perform the following tasks:
- Display the errors, warnings, and messages produced while you write code.
- Find syntax errors noted by IntelliSense.
- Find deployment errors, certain Static Analysis errors, and errors detected while applying Enterprise Template policies.
- Double-click any error message entry to open the file where the problem occurs, and move to the error location.
- Filter which entries are displayed, and which columns of information appear for each entry.
- Search for specific terms and scope the search to just the current project or document.
To display the Error List, click View / Error List, or CTRL+\+E.
c. Solution Explorer
In the Solution Exploere Window are a set of code files and other resources that are used to build an application. The files in a solution are organized hierarchically, which may or may not reflect the organization in the file system.
Solution Explorer is used to manage and to browse the different images which all together give a project inside of it has a file with the extension .sln. This .sln. file is used to open the whole project created in Visual Studio.
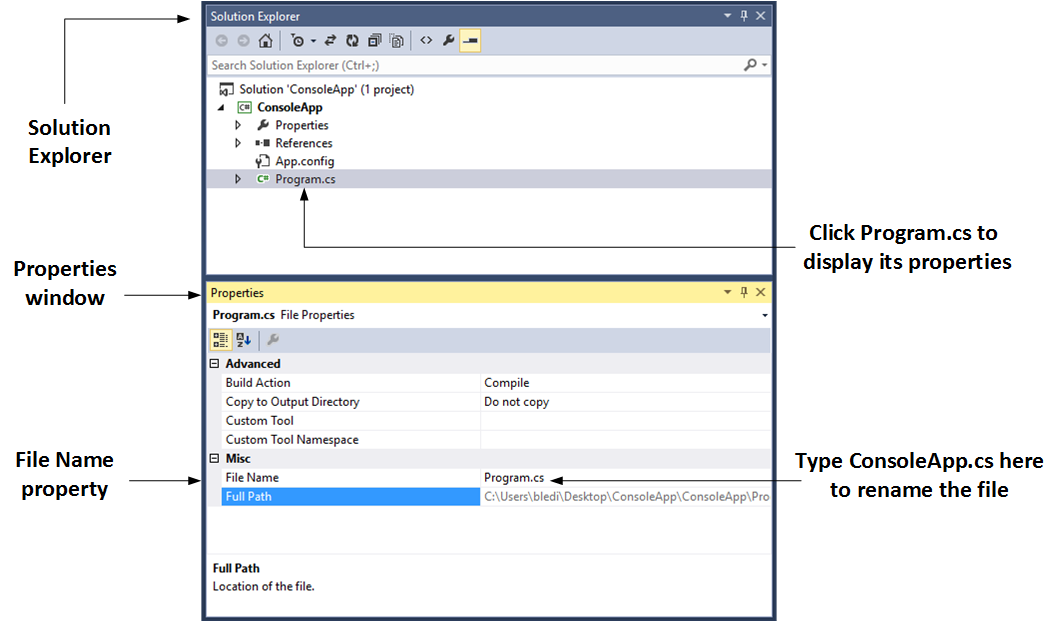
d. Properties Window
You Can use Properties window to view and change the design-time properties and events of selected objects that are located in editors and designers. You can also use the Properties window to edit and view file, project, and solution properties.
You can find Properties Window on the View menu. You can also open it by pressing F4 or by typing Properties in the Quick Launch window.
The Properties window displays different types of editing fields, depending on the needs of a particular property. These edit fields include edit boxes, drop-down lists, and links to custom editor dialog boxes. Properties shown in gray are read-only.
Creating the Windows Form Application
Open Visual Studio, select FILE New Project to display the New Project dialog. At the left side of the dialog, under Installed > Templates > Visual C# select the Windows category, then in the middle of the dialog select the Windows Form Application template. In the dialog’s Name field, type WindowsFormApplication, then click OK to create the project.
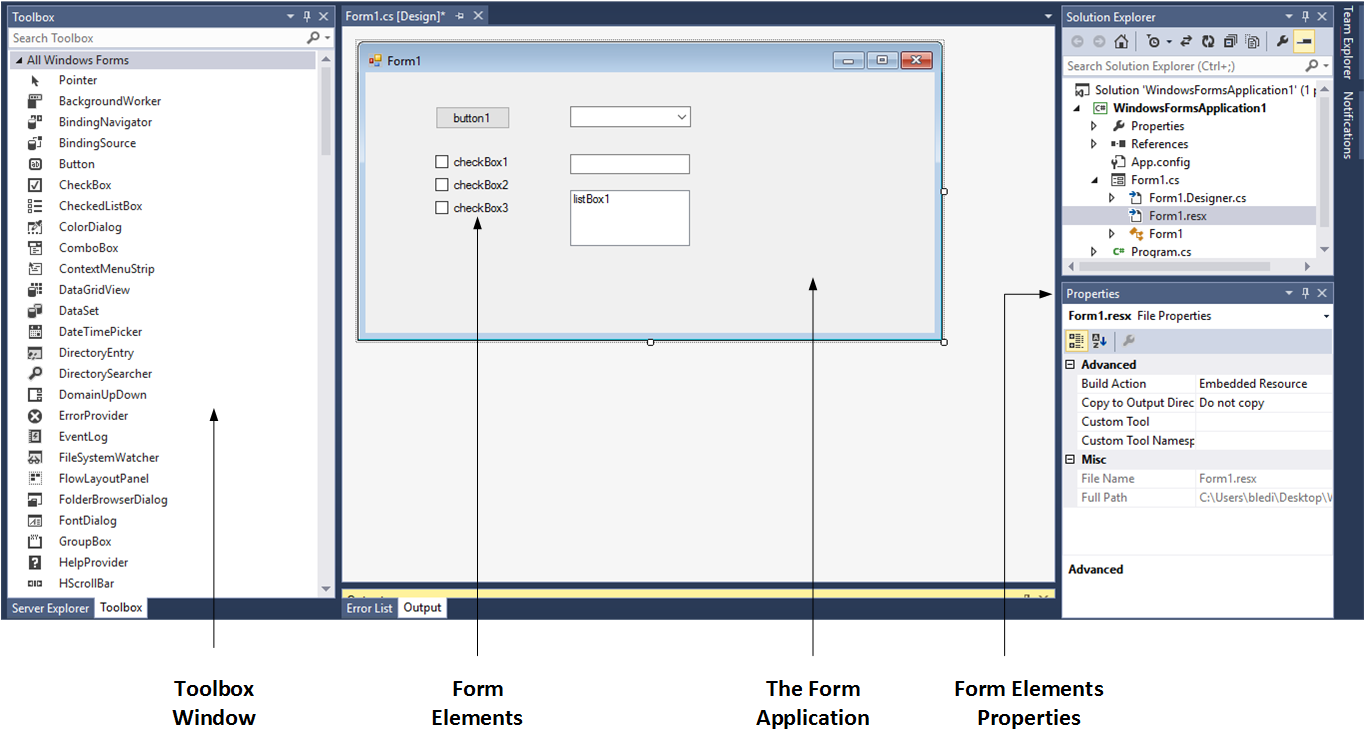
a. The Toolbox Window
The Toolbox displays icons for controls and other items that you can add to Visual Studio projects. To open the Toolbox, click Toolbox on the View menu. You can dock the Toolbox, and you can pin it open or set it to Auto Hide .
Toolbox icons can be dragged to a design view or pasted in a code editor. Either action adds the fundamental code to create an instance of the Toolbox item in the active project file.
The Toolbox displays only the items that are appropriate to the type of file you are working in. You can search within the Toolbox to further filter the items that appear.
If your project requires a control that is not supported by the Client Profile, you can set your project to target the entire framework by editing the project properties.
Ads Right